Search
Categories
Have a request?
This form does not yet contain any fields.


    Entries in portable food (17)

    Friday
    Jul052013

    Yogurt Parfaits - Make Ahead Breakfast

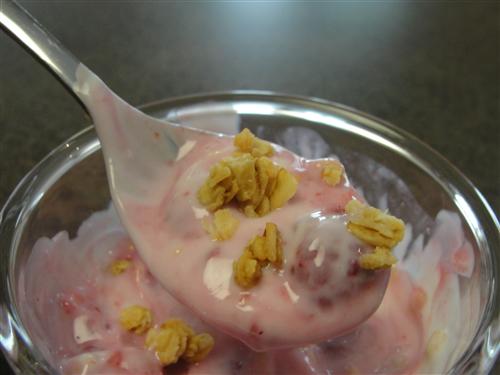
    This post definitely qualifies more as a tip than a proper recipe since you don’t have to actually make anything.  We’re way overdue for a tip, though, and with it being a holiday weekend for Americans, it seemed the perfect time for one.  Besides, these yogurt parfaits make an instant, and even portable breakfast, that is absolutely fabulous.

    Here’s what you’ll need: 

    • Yogurt
    • Frozen Berries
    • Granola

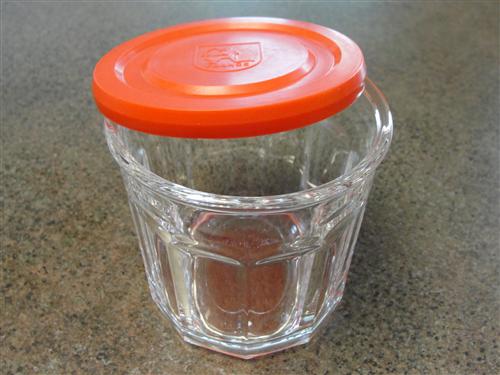
    You’ll also need containers.  I bought these jars specifically for this purpose.  I wanted something glass, with lids, that I could keep in the fridge on a regular basis without them being needed for something else.  They’re very high quality and the perfect size and shape.

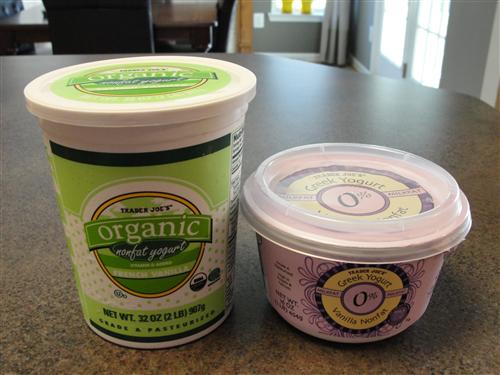
    One of the most important things about a yogurt parfait is the consistency of the yogurt itself.  The secret of getting it perfect is using a combination of regular and Greek yogurt.  My favorite is Trader Joe’s nonfat, vanilla at about a 2 parts regular to 1 part Greek ratio. 

    Pour the regular yogurt into a bowl. 

    Add the thick, Greek stuff.

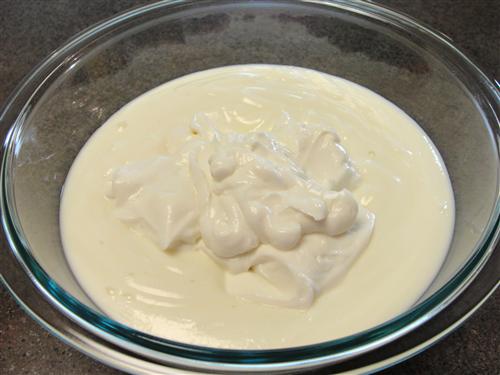
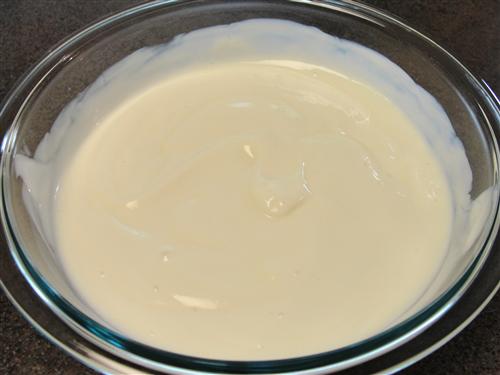
    Then stir them together until it’s nice and smooth. 

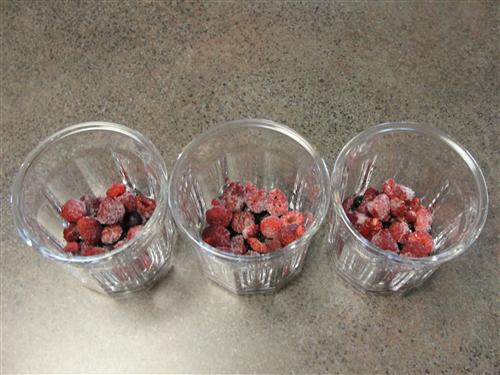
    In the bottom of each jar, put a layer of blueberries.

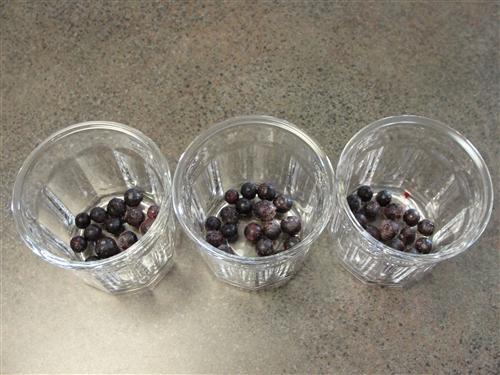
    Then a layer of raspberries.

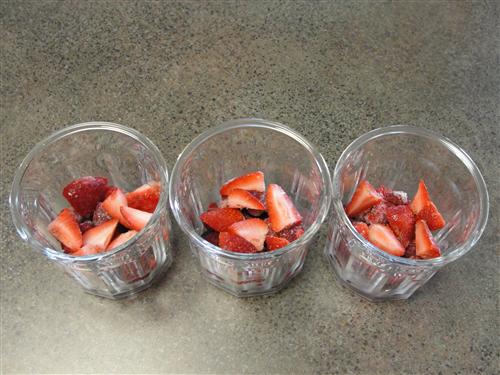
    And then the strawberries.  I like to quarter them before adding them. 

    Spoon yogurt over the top. 

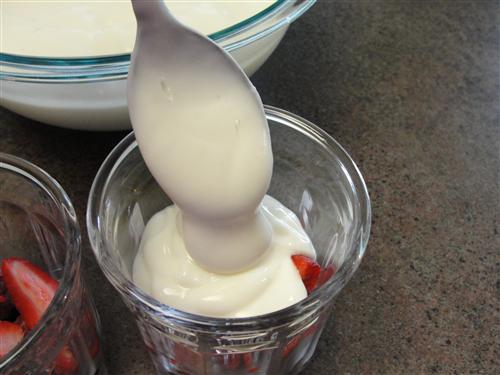
    I use about ¾ cup in each one. 

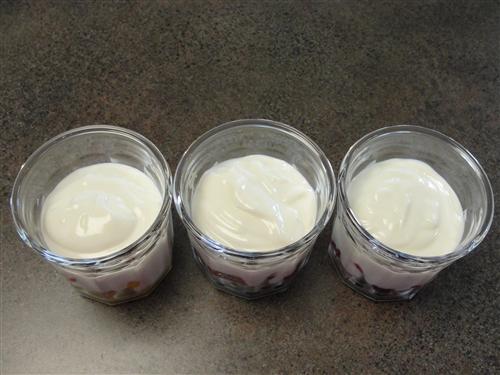
    Put them into the fridge overnight for the berries to thaw.  When you’re ready for breakfast, simply pull one out and pour some granola over the top. 

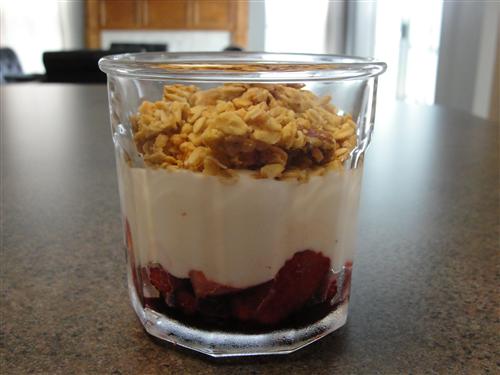
    The berries give off their juice as they thaw, so if you stir it all together, the yogurt will turn a beautiful pink color.  You can use this same method with any kind of frozen fruit, so be creative and use whatever is your favorite.  I’m sure it would be fabulous with peaches, cherries, or even mango.  No matter what you use, make 3 or 4 of them at a time, and you’ll have delicious and hearty breakfast just waiting for you when you wake up.   

    Monday
    Mar042013

    There's pizza in there!

    Up here in the frozen north, we have something called a "pizza pop." And despite the ridiculous cold and perpetual snow, a pizza pop is not a pepperoni flavoured ice cream treat.

    Why they're called pops we'll probably never know, since they're really more of a calzone. But they are a staple junk food on this side of the 49th and unbelievably easy to replicate.

    Home Made (is best) Pizza Pops

    • 1 batch of biscuit dough
    • 1/2 tin of plain tomato sauce
    • 1/2 tsp garlic powder
    • 1/2 tsp marjoram
    • 1/2 tsp oregano
    • pepperoni
    • mozza
    • other stuff you like on pizza
    • an egg and a bit of water

    A note on the cheese: while a soft squishy mozza is nice, it doesn't work well in these. It liquifies too much, and escapes out of the pop to make a lovely cheesey mess all over the baking sheet. I strongly recommend a firmer, drier mozza for these.

    I used the garlic salt in the biscuit dough (in place of the regular salt, which is in the picture, but which I didn't use), and then I found the garlic powder (not pictured) in the cupboard and so used it instead of the fresh garlic. And there's no egg. Or biscuit dough. This picture is all kinds of fail.

    So, first thing you have to do is make your biscuit dough. I know, I know, it's not pizza dough and calzones are usually made with pizza dough. I don't care. Biscuits are fast, easy, and do not contain yeast. I am really not good with yeast. I seem to kill the poor things with my bare hands. I swear I can feel them dying as I knead.

    So, I used biscuit dough, and frankly, it's more like the pop dough anyway. And I'm making pizza pops here.

    The pizza sauce is probably the toughest part of this... Put it all in a bowl. Stir. Holy hell, I'm exhausted and I need to sit down for a few minutes.

    So, you can either roll out the dough into one big blob and cut circles out of it, or you can roll small blobs of dough into circles. I've done it both ways, and I find that the big blob works best for smaller ones and small blobs work best for larger ones.

    Since I was at Recipe Guy's house and making insta-lunches to stock his freezer with, I opted for small blobs to make big pops.

    Roll the dough to no more than 3 mm thick (metric, Canadian, plus, looks better than 7/64 inches) and spread it with pizza sauce, leaving about a 1/4 inch (about 6 mm if you're playing along at home) edge all the way around.

    Lay on the pepperoni. I only used one layer in this batch, but I think two would be okay. Make a small pile of cheese on one half. Add whatever other toppings you like, and then another small drizzle of sauce.

    Fold the non cheese side over the cheese side and proceed with some form of joining of the edges.

    Me, I like to roll it by folding the bottom layer up over the top layer. If you prefer to press, (edges of pizza pops are pressed with a fork-like indentation) I suggest you use some kind of fastener, like water, or a bit of egg wash. You're going to have to make the egg wash (beat the egg with the bit of water) anyway, and it makes a pretty decent pastry glue.

    Brush them with egg wash and poke the top a few times with a fork. If steam can escape this way, it won't try and bust open an edge to get out.

    I baked these at 400 for about 17 minutes.

    The pastry is flakey, and handles both the freezer and the microwave well, and the filling is just enough pizza for a quick lunch. You could even eat it one handed.

    What else should I stuff my biscuits with?