Search
Categories
Have a request?
This form does not yet contain any fields.


    Entries by Taneasha (200)

    Friday
    May182012

    6 Tips for Making Your Meat Irresistible

    Whew!  I survived yet another big move.  That being said, I just barely got my internet turned on last night (thank you Comcast for finally sending someone competent.  Third time’s the charm, I guess) and I haven’t had time yet to do my big restock the pantry and fridge shopping trip.  Between that and the fact that we’re long overdue for a tip, rather than doing a proper post this week, I’ll be giving advice on how best to handle your meat.  I don’t know that I’m an expert on the subject, but I’ve had plenty of experience handling meats of all sizes and varieties.  Today’s tips are going to apply mostly to big ones.  Roasts basically. 

    Tip #1: 

    Buy good meat.  As with anything else, your final result can only be as good as the product you start with.  Now, when I say good, I don’t mean buy an expensive cut of meat.  I mean, get meat as close to the farm as possible.  I guarantee a piece of meat from some mega mart is not going to taste as good as something more natural, no matter what they say on their commercials.  If you don’t have a farm or market nearby to get your meat, at the very least try to find beef that is grass fed.  If you can find pastured beef, even better.  The cows will thank you too. 

    Tip #2:

    Don’t be afraid of the salt.  No one will enjoy your meat if it doesn’t taste good.  A big piece of meat needs plenty of salt, and since it’s basically a rock, you don’t have to worry about it burning during the cooking process like pepper and other spices can. 

    Tip #3:

    Sear your meat.  I always hear people say you need to sear meat to lock in the juices.  Well, I don’t really know if that’s true or not.  I’ll tell you how to keep your meat from losing its juices in tip #5.  As for searing, the truth of that matter is it brings an immense amount of flavor to your meat, not to mention the flavor it gives to anything that’s cooked with it, and any gravy or pan sauce made from the drippings.  High heat, a little oil, set the meat in and don’t move it around.  When it’s ready, it will release itself from the pan and you can easily flip it.  This piece of meat isn’t burned.  It’s perfectly seared and will be absolutely delicious when it’s finished. 

    Tip #4:

    Low and slow.  I know you’ve heard that phrase a million times, but when cooking a roast it is essential.  After the searing process, I add plenty of liquid and usually cook my roasts between 225° and 250° for a good three hours or so.  Trust me, your patience will be rewarded.   

    Tip #5:

    As I said before, this is where your meat's juices come into play.  When your meat is done (if it’s not super tender, it’s not done) remove it from the pan, set it aside, and cover it with foil to rest.  Ten minutes is the absolute minimum and 20 or 30 is even better.  I like to cook my carrots and potatoes in the beef broth while the meat is resting.  If you cut the meat right away, all of its juices will run out.  Those are important, especially in a roast.  Who knew a simple piece of meat would require so much patience, huh? 

    Tip #6:

    For the most tender pieces of meat, always cut across the grain.  With something like a chuck roast, you’ll probably end up with chunks rather than slices, and that’s totally fine.  But if it’s a bottom round or a rump roast, definitely slice against the grain.  Melt in your mouth tender, moist, and delicious. 

    So there you have it, 6 tips on how to handle your meat that will make you and anyone else eating it happy. 


    Tuesday
    May082012

    Moving Mayhem - Raspberry Cupcake Edition

    Call it prophecy or call it coincidence… either way, it’s somewhat humorous that I made this post one year ago and titled it Moving Mayhem – Bread Pudding Edition.  It’s almost as if I was setting myself up for another edition.  I just hope there isn’t another Moving Mayhem post in 2013.  This move should go much more smoothly than last year’s, even though we’re basically just doing the second half of that move in reverse.  If the weather forecasters are right, we at least won’t be dodging tornados.  So, since this move is only 500 miles and we’ll be doing it in basically 2 days, I’m not getting rid of everything.  That meant I could make whatever I wanted and didn’t have to worry about using up my good stuff.  It will be going with me.  With that in mind, I decided I wanted raspberry muffins, but since Seeley recently made muffins, I decided to change it to raspberry cupcakes, and the cupcakes vs. muffins discussion began.

    Either way, here’s what you’ll need:

    ½ cup butter
    ¾ cup sugar
    2 teaspoons vanilla
    2 eggs, separated
    ⅔ cup buttermilk
    1 ½ cups flour
    ½ teaspoon soda
    ½ teaspoon powder
    1 cup raspberries 

    So, I have to admit to not getting the best looking berries.  One of the other brands had much bigger, prettier berries, but they didn’t smell at all.  These ones, on the other hand, smelled amazing.  In fruit, aroma almost always trumps appearance. 

    If you can’t find any that are good, you could probably use frozen ones.  Just make sure they have thawed and come to room temperature.  In fact, it’s important to note that everything in this recipe must be room temperature.  So, on that note, throw your softened butter into the bowl of your mixer.

    Add the sugar and beat on medium speed for about 2 minutes, or until it’s light and fluffy. 

    Next, separate your eggs and put the whites aside. 

    Add the yolks and vanilla to your butter mixture and beat until thoroughly incorporated.

    In a separate bowl, whisk together your dry ingredients. 

    Add ⅓ of the dry mixture to the batter and mix to combine. 

    Follow that with half of the buttermilk. 

    Then another third of the dry, the other half of the wet, and finally the last of the dry.  You should have a nice smooth batter.  Obviously, everything needs to be scraped down.

    Now back those egg whites you set aside.

    Whip them until you have stiff peaks. 

    Now, rinse your raspberries and add them to the bowl. 

    You don’t want to totally decimate the raspberries, so just mix enough to break them up some.  It will be more evenly distributed after you’ve finished folding in the egg whites. 

    Which you’re going to do now.  Start with half of the egg whites.  Just drop them on top.

    Then fold them in.  This will lighten up the batter some, which will makes the second edition easier to incorporate. 

    Fold that in now.

    Um, somewhere in that process you should have preheated your oven to 350°.  Scoop the batter, filling the cups almost to the top.  I used a ¼ cup measuring cup for this process.  Somehow I haven’t managed to buy a muffin scoop.  At some point after I’ve moved, I’ll probably remedy that situation. 

    Just before you put the cupcakes into the oven, turn the temperature up to 425°.  Place the cupcakes in the oven, leaving the temperature at 425° for 5 minutes, and then turn it back down to 350°.  That extra heat helps to keep your cupcakes nicely rounded on top and stops them from sinking in the middle.  Bake them for a total of 25-30 minutes, or until a toothpick inserted into the middle comes out clean, or perhaps with a few crumbs on it. 

    Remove them from the pan as soon as you can and place them on a rack to cool.

    Now it’s time for what I think makes a cupcake a cupcake… the frosting.  I keep reading about this amazing flour/cornstarch based frosting that is the most amazing frosting ever made.  I guess it’s time I gave it a try.  After much research, I took the parts I liked from different sources and put them together to form my own version of said frosting. 

    Here’s what you’ll need:

    ¾ cup milk
    ¾ cup sugar
    2 Tablespoons cornstarch
    ¼ teaspoon salt
    1 ½ sticks  (¾  cup) unsalted butter
    1 teaspoon vanilla 

    When making frosting it’s important to use unsalted butter.  Salty frosting… not such a good thing.  Place your sugar, salt, and cornstarch into a medium saucepan.

    Whisk them together until there are no more clumps of cornstarch. 

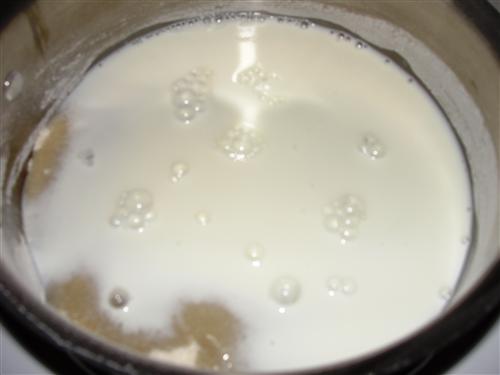
    Add the milk.

    Cook over medium heat, stirring constantly, until the sugar is dissolved and the mixture thickens.  You don’t want it to reach a rolling boil.  You’ll know it’s ready when you start to see the pan while you’re stirring. 

    When you’ve reached that stage, remove it from the heat and allow it to cool.  It’s important that it is room temperature, and not even a little bit warm when you start the next part.  Place the softened butter into your mixing bowl.  You’ll want to use the whisk attachment this time.  Whip the butter until it’s nice and fluffy. 

    Pour in the cooled milk mixture and add the vanilla. 

    Then just start mixing.  At first you’re going to have a curdled mess.

    But just keep mixing.  We’re talking like high speed for at least 5 minutes.  I actually had to walk away from mine for a bit so it could do its thing without me panicking and hovering.  Eventually, you’ll have this.  A smooth, creamy, and quite frankly, perfect frosting. 

    I think the reviews I’ve read were right.  Not only is the flavor and texture of this frosting seriously amazing, but it pipes beautifully. 

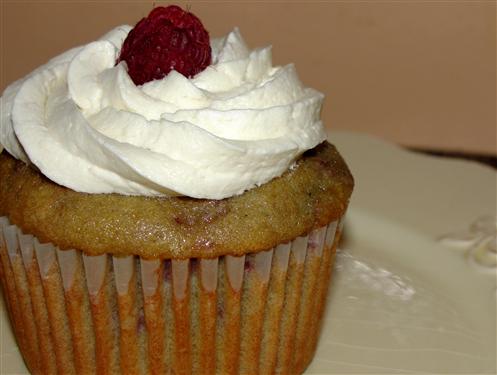
    Pipe it on or spread it, whichever you prefer, then just top with a fresh raspberry, and you have cupcake perfection. 

    These cupcakes are moist and tender, and the slightly tart berries pair perfectly with the sweet frosting.  Seriously divine. 

    So what’s the difference between a cupcake and a muffin to you?