Search
Categories
Have a request?
This form does not yet contain any fields.


    Entries by Taneasha (200)

    Friday
    Sep092011

    The Best Raspberry Cheesecake Ever!

    So, this probably isn’t exactly the picture that comes to mind when someone says the word cheesecake, but this is the cheesecake from my childhood.  It was a rare treat we’d usually only get during raspberry season, but it's always been one of my favorite things.  I’ve tasted different varieties of cheesecake from all kinds of restaurants, even including the Cheesecake Factory, but none of them was ever as good as Mom’s.  Now I’m going to show you how to make it. 

    Here’s what you’ll need:

    Crust:
    13 graham crackers
    1 Tablespoon sugar
    ½ teaspoon cinnamon
    ½ cup butter

    Cheesecake:
    12 oz. cream cheese
    ¾ cup sugar
    1 ½ Tablespoons lemon juice
    2 teaspoons vanilla
    3 eggs

    Fruit topping:
    1 ½ cups juice
    2 Tablespoons corn starch
    ½ cup sugar

    First up, the crust.  Melt one stick of butter and set it aside.  Then, in a food processor or blender, grind the graham crackers into very fine crumbs.  Pour them into a 9 inch pie pan and sprinkle on the cinnamon and sugar.

    Mix those ingredients together and pour on your butter.

    With a fork, stir the crumbs and butter together until you get something that resembles wet sand.
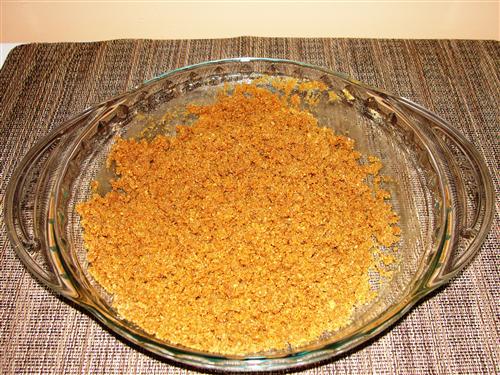
    Now, spread the crumbs evenly in the pan, and press them into shape.  I used a small measuring cup, which has a flat bottom and is the basic shape I want for the edges as well.  If you don’t have measuring cups like these, be creative.  I’m sure you can find the perfect tool somewhere in your kitchen. 
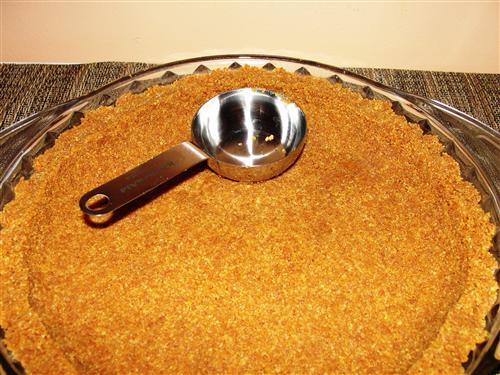
    Now, place the crust in the fridge and preheat your oven to 325°.  It’s best if all the ingredients for the filling are at room temperature, so pull them out several hours ahead, or even the night before will be fine.  Put the cream cheese in a bowl and mix until it’s nice and smooth.  Then, add the lemon juice, vanilla, and sugar.

    Mix those together, and you’ll end up with something like this. 

    As evidenced by the glops of unincorporated cream cheese, this bowl and beater need to be scraped down. 

    Ah, that’s much better.  You’ll want to scrape down the sides and bottom of the bowl, along with the beater, several times throughout this process.  So, where were we?  Oh yes, time for the eggs.  I like to crack mine into a separate little dish and add them from there.  Not only does it give you a chance to pick out shells if you get them, but it’s also the perfect place to pick the white goobers off of the yolk.  Yes, my mom assures me that goobers is in fact, the scientific term for those things.  And yes, I do remove them from every egg I use.  You all were starting to wonder where I get these magical eggs that don’t have goobers, but really, it’s just a bit of my OCD showing.  Now that we’ve covered that, add your eggs, one at a time, to the mixture.  Make sure each one is fully incorporated before adding the next. 

    Scrape and mix a few times until everything is nice a smooth, then pull out your pie crust and pour in the cheesecake mixture. 

    Pop it into the oven and bake for 40 minutes.  There will still be a bit of jiggle factor when you remove it from the oven, but it should all move the same.  If the center is softer, give it a few more minutes of cooking time. 
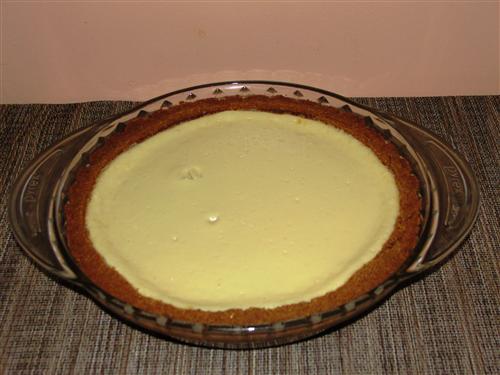
    As you can see, mine had a couple big air bubbles, but not to worry.  Those will be completely covered soon enough.  For now, leave it to cool for an hour or so before starting on the fruit topping.  If it doesn’t have time to cool down, the steam it gives off during that process will cause the cheesecake and fruit topping to separate.  For the filling, the first thing you need to do is wash your berries.  I don’t know how many times I’ve seen tv chefs just open the container and dump them in.  Personally, I’d like to get rid of as many bugs as possible.  Be gentle, though.  Raspberries are fragile. 

    Now for the sauce.  Put your sugar and cornstarch in a pan and whisk them together.  This ensures you won’t have any lumps of cornstarch. 

    Pour in your juice and turn the heat to medium.  I used a mixed berry juice.  You can use whatever flavor you like, but the closer you can get to raspberry, the better. 

    Stir, making sure you get all the way into the corners of your pan, so you don’t miss any of the cornstarch.  Keep stirring until the mixture just comes to a boil, then turn off the heat.  Add the raspberries and stir gently. 

    Let the mixture sit for a few minutes to give the raspberries a chance to give off whatever liquid they’re going to, then stir it once more, and pour it over the top of your cheesecake. 
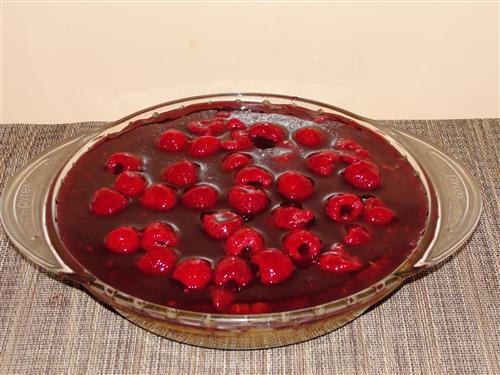
    Place the whole thing in the fridge and allow it to chill for several hours.  Don’t rush it.  For me, it’s best to do this right before bed. 
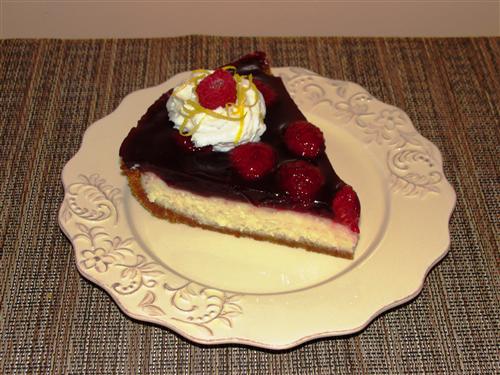
    Mmmmmm.  Cheesecake for breakfast.  What?  It’s fruit and cheese and… ok, it’s cheesecake, but it’s fabulous, whenever you eat it. 
     

    Friday
    Sep022011

    Buffalo Wings - Thanks to Hurricane Irene

    I know many people’s lives were shaken up by Hurricane Irene.  My heart goes out to all who were affected negatively by the storm.  And I apologize if I'm the reason for it coming here.  These things seem to be following me.  I'm not entirely certain I haven't become part of a Final Destination movie.  As for me, I have to say thank you to Irene.  Without her, we wouldn’t have spontaneously decided to leave the home we just moved into and take a trip to Buffalo.  We wouldn’t have experienced stopping at 4:00 in the morning to sleep for a few hours in the only room available along the way… a jacuzzi room at the Budget Inn.  Heart shaped jacuzzi, colored lights, mirrors… Eewww.  We wouldn’t have eaten “The Original” Buffalo wings.  And most importantly, without Hurricane Irene, we wouldn’t have seen this.

    This picture hasn’t been photoshopped or enhanced in any way.  It is a picture Hubby took with his iphone, and it is just one of the many views we got to see.  Niagara Falls is, without doubt, one of the most beautiful, most amazing places on earth.  It’s beauty like this, that the word breathtaking was created for. 

    So, moving on to Buffalo wings.  As I mentioned before, we stopped in at the Anchor Bar, home of the original Buffalo wing.  My reaction… I can do better.  I probably had no business making that statement, since I’ve never made wings before, but I wasn’t terribly impressed.  Now, I don’t know if this is a Utah thing, or what, but we eat our wings with ranch dressing.  Since ranch from a bottle always sucks, I make my own.  It has to be made first so that it has a few hours in the fridge for the flavors to get friendly.  If you like blue cheese, I’m afraid you’re on your own. 

    For the ranch:

    1 cup mayo
    ⅓ cup buttermilk
    1 Tablespoon chives
    1 Tablespoon parsley
    1 Tablespoon dill
    ½ teaspoon garlic powder
    ½ teaspoon onion powder
    ¼ teaspoon salt
    ¼ teaspoon pepper

    Measure the mayo into a bowl and pour in the buttermilk. 

    Whisk them together until they become a smooth mixture.  Now for the herbs.  If you cut your chives in half and line them up like this, they’re easier to chop. 

    The parsley should be chopped finely.

    The dill as well.  Make sure you don’t use any large stems of the dill or parsley.

    Throw all your herbs into the mayo mixture and sprinkle on the spices. 

    Stir it all together, and you have ranch dressing.  Simply cover and refrigerate it for a few hours. 

    Next in line is the Buffalo sauce.  You’ll want to make this in advance, as well, so that it has an hour or so to cool. 


    Sauce stuff:

    1 cup hot sauce
    ½ cup butter
    ¼ teaspoon garlic powder
    ¼ teaspoon onion powder
    ¼ teaspoon salt
    ¼ teaspoon pepper
    1 teaspoon sugar


    Measure 1 cup of whatever your favorite hot sauce is.  Hubby likes Cholula, so that’s what I used. 

    This is where you can adjust the heat level of your wings.  I’d rate this somewhere around medium hot.  If you want milder wings, reduce the amount of hot sauce or increase the butter.  Also, I only made 12 wings, but this would be plenty of sauce for even 30 or more wings.  Pour your hot sauce into a pan over medium heat, and add the butter and spices. 

    Stir it until it just starts to simmer, then turn off the heat, and stir in the sugar. 

    After that has had some time to cool, it’s finally time to start on the main attraction.  The wings! 

    Here’s what you’ll need:

    12 wings (6 whole ones)
    2 Tablespoons oil
    ¼ teaspoon garlic powder
    ¼ teaspoon onion powder
    ¼ teaspoon salt
    ¼ teaspoon pepper
    2 Tablespoons Buffalo sauce
    ¾ cup flour
    Oil Spray

    *I was apparently smoking crack when I set up this picture.  There is no butter for this part, but there is oil spray.

    If you can get your wings already separated into wingettes and drumettes from your butcher, do it.  It’s a bit of a pain to process them yourself.  I’m not going to go over how to do it here, but this is a great video tutorial.  Once that’s done, throw your wings into a zip top bag along with the oil, spices, and sauce. 

    Close the bag most of the way, then blow into it and seal it to make it like a balloon. 

    Shake the bag around to get everything coated evenly.  Then pour in the flour, reinflate the bag, and toss again.  The wings should all be nicely coated. 

    Line a sheet pan with foil and spray on some oil.  Place the wings on the pan and spray the wings with oil as well. 

    Bake them at 400° (oops, did I forget to mention that you need to preheat your oven?) for 30 minutes. 

    They don’t look really fabulous at this point, but flip them over and put them back in for another 30 minutes, and good things happen.

    Give them about 5 minutes too cool and then place them in a bowl and pour over some sauce. 

    I used maybe ⅓ cup or so for 12 wings.  Just use as much as you like.  Stir or toss the wings to give them an even coating of sauce.  Serve with lots of ranch and a few bits of veg. 

    So, are they better than ‘the original’? 

    Hell yes they are!