braaaaaains
 Seeley deBorn
 Well, not really.
But that's what we called them when we were kids. My brother and I that is. We were odd kids (you're surprised, I'm sure) and if we could come up with an alternative name for something, the grosser the better, we did. So we called wonton soup "gopher brain soup." They do look like little brains.
Prepare for the apocalypse.
Wonton Soup
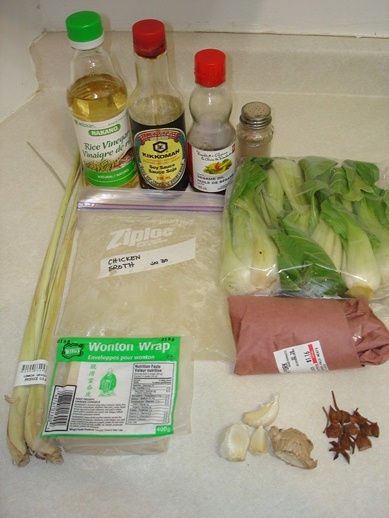
What you need:
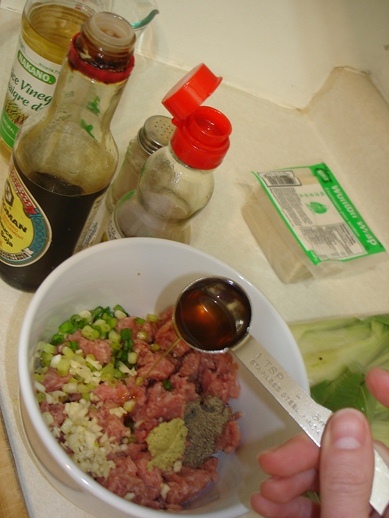
- 1/2 lb ground pork
- 3 cloves garlic
- 1 inch chunk of ginger
- 1 star anise
- 1 stalk lemongrass
- 1/4 tsp finely ground black pepper
- 1 tsp sesame oil
- 2 tsp soy sauce
- 3 tsp rice wine vinegar (or some kind of rice wine)
- 3 green onions
- 2 c chicken broth (or pork or beef)
- wonton wrappers (about 25)
- baby bok choy (optional)
What you gotta do:
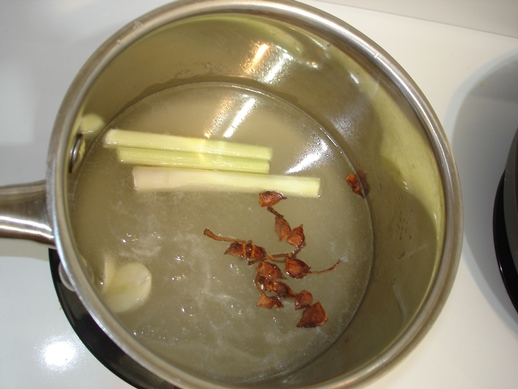
First, get your broth simering with some flavourants. One clove of garlic, the star anise (I'm kinda at the bottom of my bag and have only broken pieces left), and the lemongrass. You can leave out the lemongrass if you can't find it, but the star anise really makes the flavour in the broth.
While that simmers, mostly covered, over medium heat, make the wontons.
Yes, we are making wontons. It's not difficult and a lot faster than you think.
In a bowl, combine the pork, the other 2 cloves of garlic (after you mince them), the ginger (finely minced or grated on a microplane grater), the green onion (keep a bit of the greener parts off to the side for garnish), the pepper, the soy sauce, the sesame oil, and the vinegar.
My ginger looks a little odd in the bowl because it was blue. I once went to a restaurant called Blue Ginger, and I thought it was just a name, but nope; ginger can be blue.
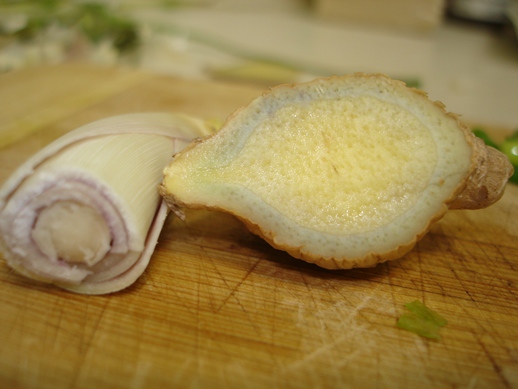
Lemongrass is purple too!
So, mix up your pork with all the seasonings. It will be a nice moist meatball by the time you're done.
Now, the wrapping. Get yourself set up with a plate or two, a small dish of water, and some damp paper towels.

Use your 1 tsp measuring spoon to scoop a tsp of meaty filling onto a wonton wrapper.
I can get these at my usual grocery, but they were nearly impossible to find in Texas, and Recipe Guy and I had to go to 3 or 4 stores before we finally found them. Mine are in the frozen section, but you can sometimes find them near the vegetables. I don't know why. That's just where they were.
Wet the wonton wrapper and start folding. Folding is a two-hand job (handjob) so it's a bit tough to take pictures of. But here goes.
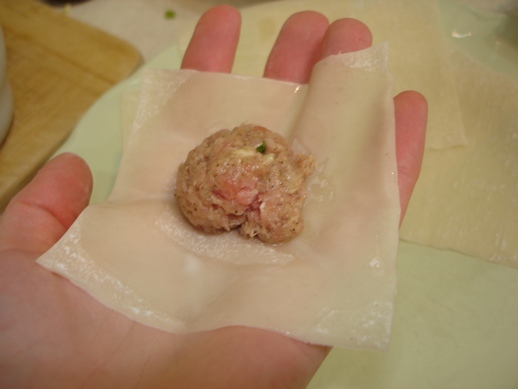
Fold the wrapper into a triangle and stick the top points together.
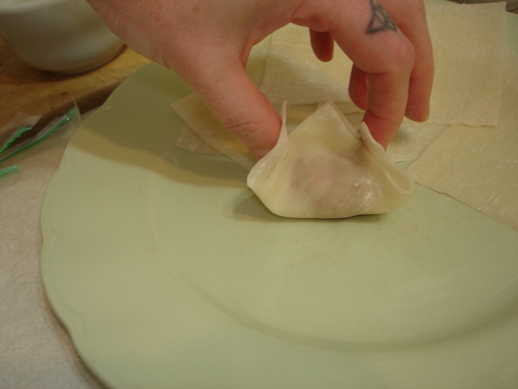
Push the two points that are sticking out in toward the points that are stuck together. You'll end up with a kind of four pointed star. Flatten the star so that you have a chubby little packet that's round on the bottom and flat at the top.
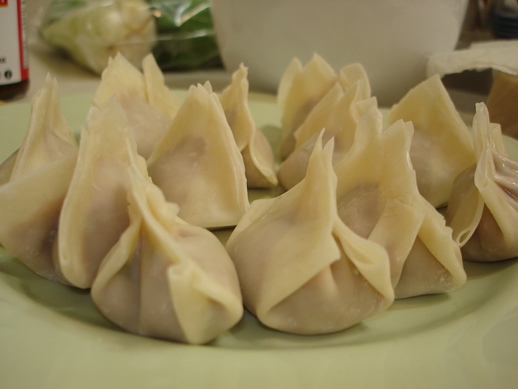
I hope that makes sense.
Once you get into the groove, they take seconds to make. It's not surprising that the wonton wrappers come in packages of about 500. You could easily make the whole package into wontons in no time. (no, it's not really a packet of 500, probably closer to 200, but still, that's a lot of wontons)
Okay, now for the cooking. You can boil these little dumplings right in the broth if you like, but I prefer to cook them separately. There are a couple reasons.
If you are making 500 wontons, you're going to be cooking them in batches. Much easier to do in a big pot of water. The 500 can be boiled and then kept in a container in the fridge for a good few days. Once they're cooked, drain them and drop them in the container with a few drops of peanut or sesame oil to keep them from sticking together; keep the broth in a separate container and make wonton soup whenever you want.
You can freeze them too, individually, on a cookie sheet then drop them in a bag and they'll be good for at least a couple months.
The other reason I prefer to cook them alone is the flour on the wrappers. It will cloud and thicken the broth and that's not the ideal aesthetic. You want the broth clear and light. Ideally.
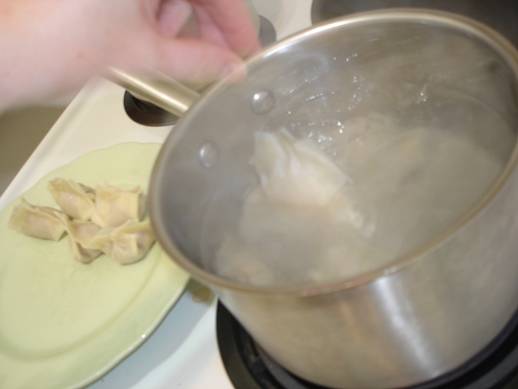
So, I dropped mine into a large pot of boiling water. Give them a stir right away so they don't stick to the bottom.
When they're done, they'll be floating, just like perogies or ravioli. They take about 7 minutes to cook. No, it's not a lot of time. It's just enough time to fish the anise etc. out of the chicken broth, trim and rinse the bok choy, and toss it in the broth.
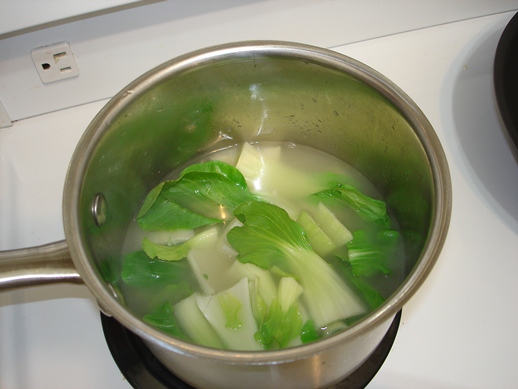
By the time the wontons are done, the bok choy will be too.
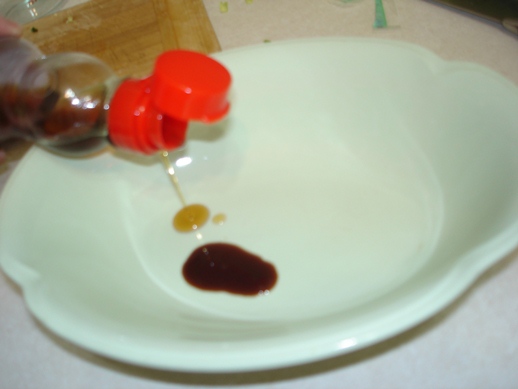
For the final seasoning, put a splash of soy sauce and a few drops of sesame oil in the bottom of the bowl.
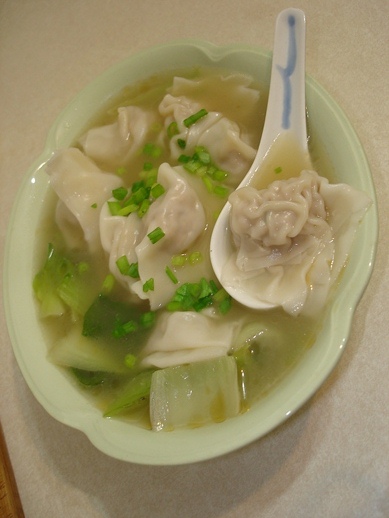
Drain the wontons, and drop them into the bowl, then ladle the broth on top. Garnish with the green onions.
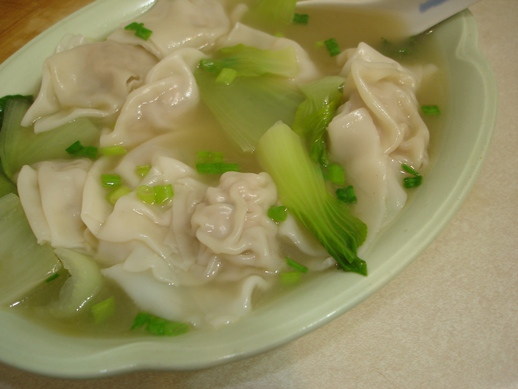
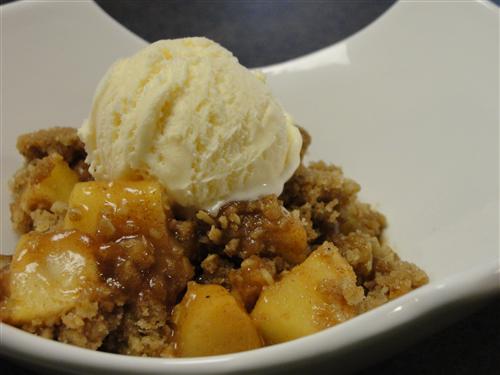
Gopher brain soup for dinner!
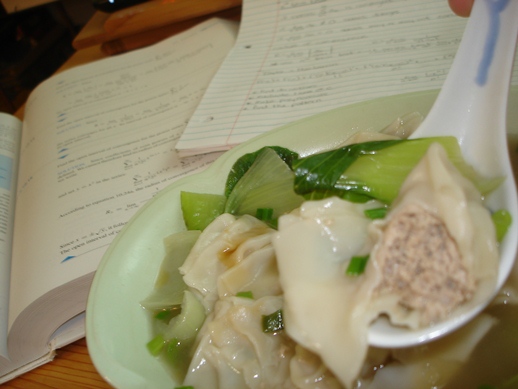
Hey, I need some brains over here. It's midterm time, and once again it's all about the calculus.
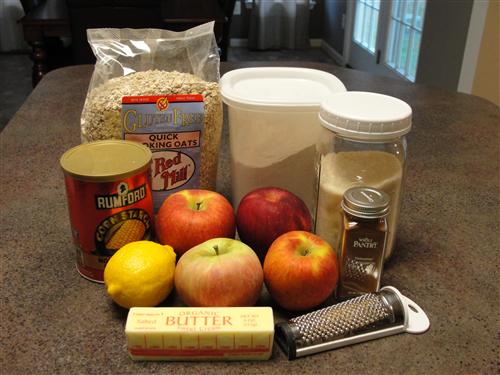
And once again, I missed an ingredient in the ingredients pic.
Quick! What was it??
(this is a test and the result will go on your permanent record. forever.)